Fitting a Translogic Powershift to a Ducati Supersport 939
I’ve been a type 1 diabetic for nearly 35 years and although my diabetes has been
fairly well controlled it became apparent about 6 years ago that I was having
circulation issues with my legs and feet. In November 2023 I developed an ulcer at
the base of the 4th toe on my left foot. To cut a long story short I ended with
amputation of my left foot in February 2025.
As a life long motorcyclist this looked like an absolute disaster. Initially I thought
that was going to be the end of my motorcycling. However I did a bit of research
and found 2 push button gear change systems available in the UK.
Kliktronic and
The Kliktronic weighs a whopping 2Kg, was going to present problems with fitting
and the manufacturers weren’t particularly helpful, although as a recognised
adaption for disabled riders I could have got it less VAT (20%).
The Powershift only weighs 650g and Translogic were helpful in suggesting fitting
options. I opted for the Powershift despite the cost, with the intention of fitting it to
my Ducati Supersport 939. I also have a Ducati Scrambler but the Supersport is the
bike I like best. The Scrambler will be up for sale. Finally at the end of August this
year I got a prosthetic fitment that allowed me enough knee movement to get on a
bike.
Although I’m fitting the kit to a Ducati the same basic principles will apply to virtually
any bike with 12V electrics.
The kit arrived very quickly and came nicely packed in small box containing the
actuator, a small electronic control unit, a push button assembly for handlebar
mounting, a wiring harness and a load of fittings. The instructions came as a
downloadable PDF.
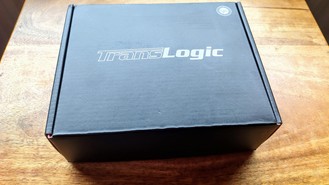
Translogic Box
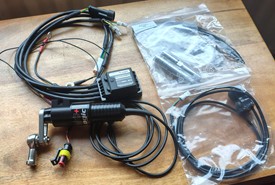
Translogic Powershift Kit
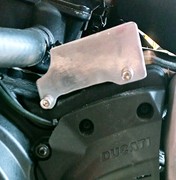
Alloy Mounting Plate
-
The picture on the left shows the 76mm alloy plate that I made to mount the
actuator, on the right is Translogic’s recommendation
-
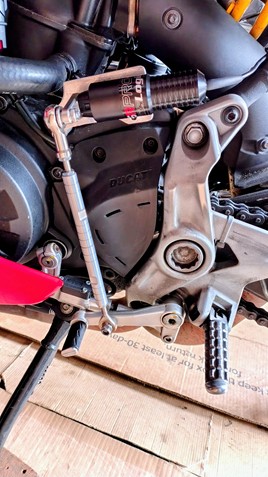
I then drilled the gear lever to take the rose joint coupling for the tie rod, and with
the tie rod attached to it and the actuator at the other end I marked out a suitable
place on the mounting plate and drilled it to suit. This was all then fixed in place
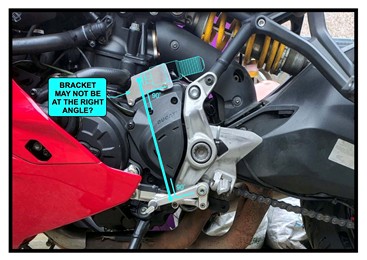
Translogic Lever Position

Translogic wiring under seat.
Next was the wiring. I fitted the control unit under the seat and I had to splice a single wire into the switched side of one of the coils, I chose the vertical because it was easiest to get at. The only other wires were a connection to a switched ignition supply and a connection to earth, I used the OEM accessory socket. The actuator and handlebar switches simply plugged into the connectors from the control unit. Getting all the wires under the seat was a quite a squeeze as there were two additional wires for options that I didn’t need. Finally I mounted the push button assembly to the LH handlebar.
Finally I mounted the push button assembly to the LH handlebar.
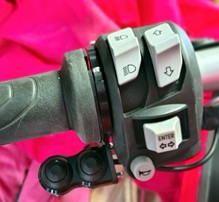
Push Buttons on Handlebars
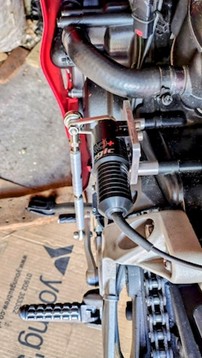
Translogic actuator on mounting plate
Translogic Actuator and control rod to gear change.
I then tried it out with the bike mounted in an Abba stand. All the gears selected
easily and a short dab on the UP button from first gear would put the bike into
neutral, or similarly on the DOWN button from second gear.
I then got my first bike ride in a year. The Powershift worked as intended although
initially it had a few issues downshifting until I adjusted the tie rod length.
My 1948 BSA ZB32 doesn’t need any conversion as the gear change like all old
British bikes is on the right, I’ve just got to master starting it. I’m looking forward to
more a few more years of motorcycling.
by Derek Blackie copyright 2025